Send Dubsado Leads to Flodesk Automatically
Technology is the very best. In this post, I’m going to teach you how to use it to automatically (and without being spammy) send your Dubsado lead’s who opt-in to receive your newsletter into your flodesk using Zapier.
This can be done with other tech stacks – but these are my favorites that I use, so I’m gonna teach using them!
Here is my video teaching on it – or skip below for a step-by-step walk-thru!
step one – create a custom field in Dubsado
In order to get and fully automate your future client’s permission to put them on your marketing list – we need to ask them, then filter by their response.
In Settings of your Dubsado (the gear on the upper right-hand side) choose custom-mapped fields.
Then we will create a Client Custom Mapped field (instead of a project field). This way their decision to be marketed is based on the person, not the project.
You must choose the short answer, at this time there is no check-box or yes/no option to be a custom mapped field (one day I hope it is!)
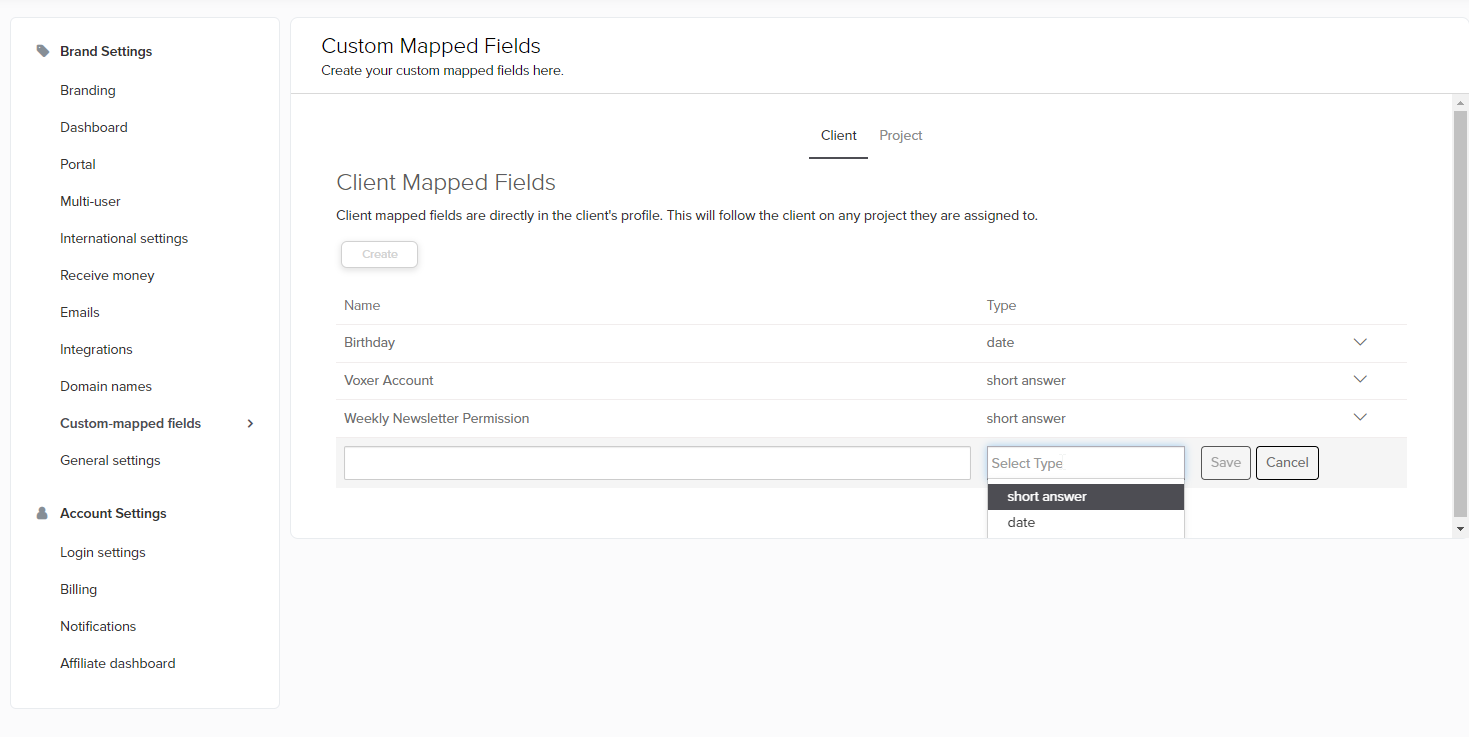
Name the field something simple + clear. I chose “Weekly Newsletter Permission.” Then save.
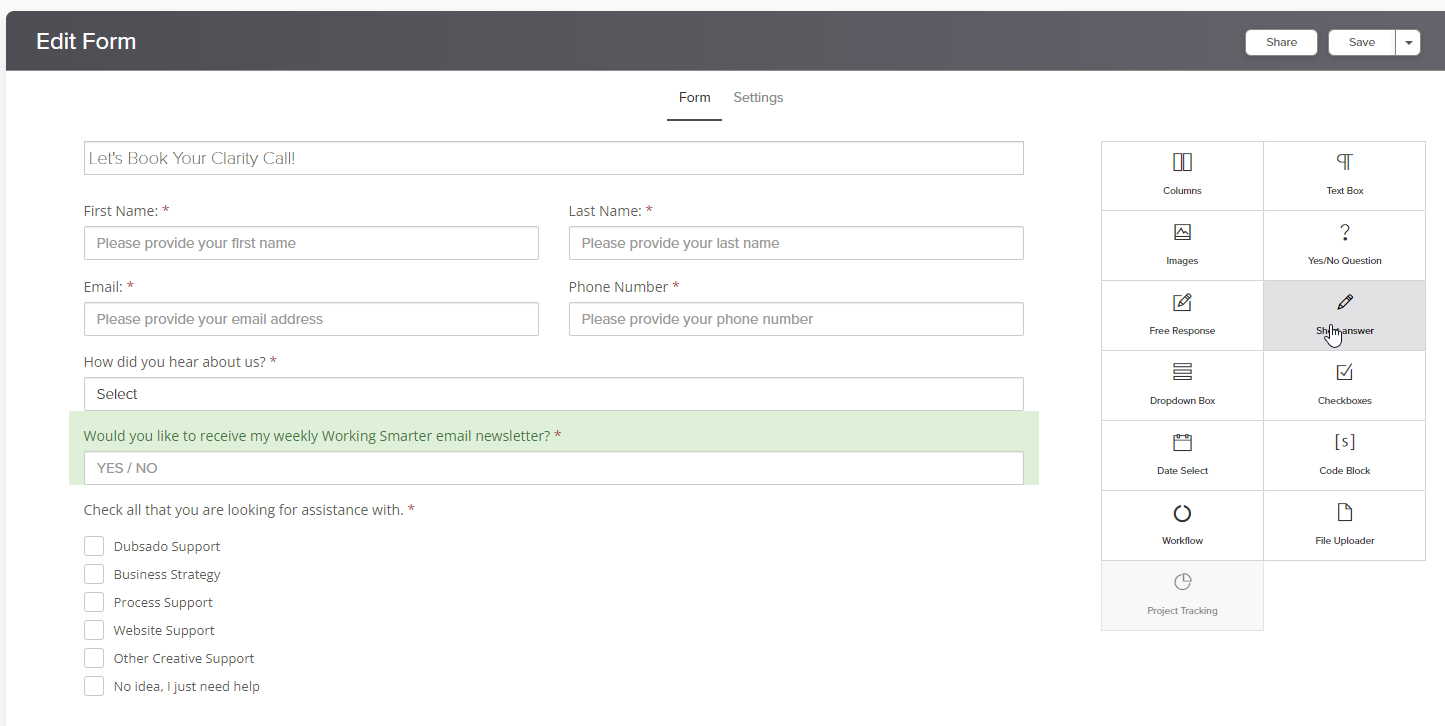
step two– add the custom field to your lead capture form(s)
Open your lead capture form that you’d like to ask permission to add the lead to your newsletter.
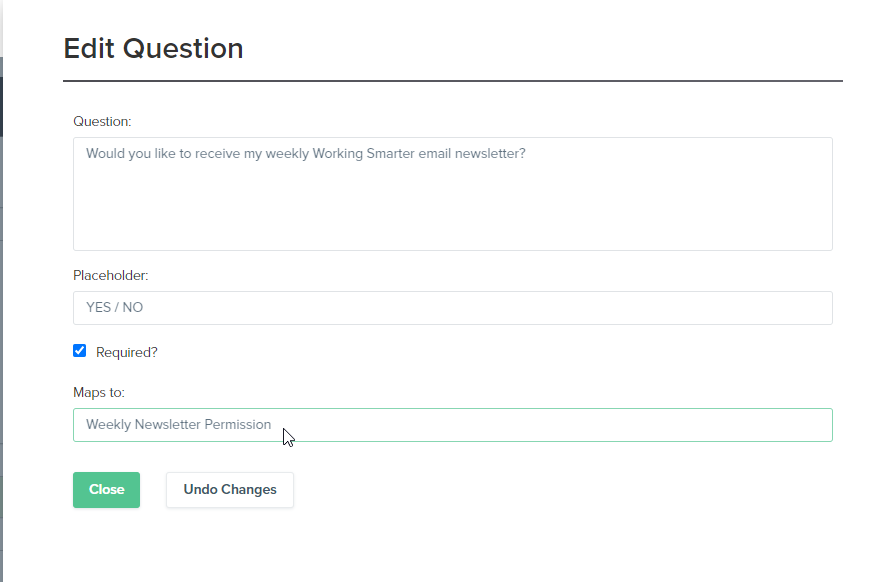
Add a short answer to the form and then when you edit the short answer you will:
-
Name the question
-
In the place holder put yes/no to guide the response, you are looking for
-
Change the Maps to: the client mapped field you just created
-
Optional: make the answer required
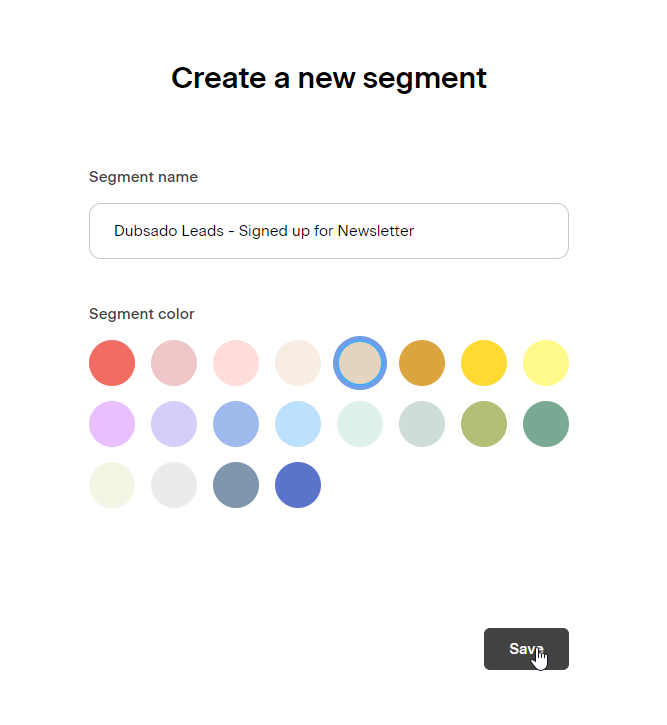
step three – create the audience segment in flodesk
To create a new segment, go to Audience > Segments > + New Segment
Give the new segment a name and color. Name this segment as specific as you can so you know where they signed up from.

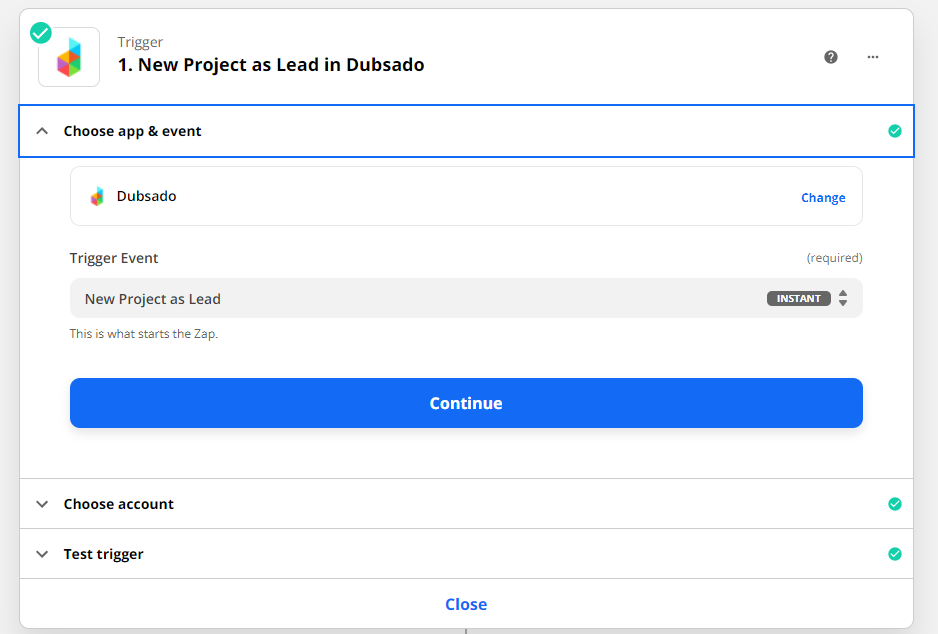
step four– tie it all together with zapier
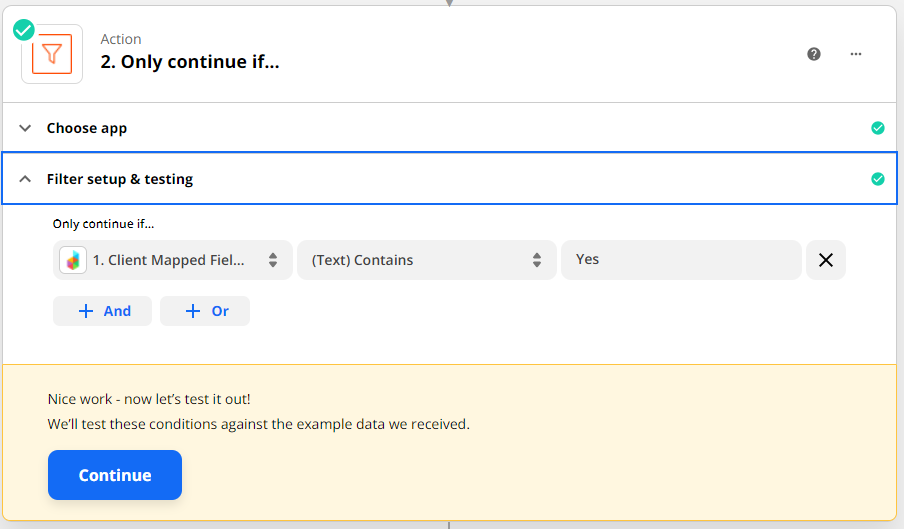
This is the most complex step, it is an automation with Zapier to send the information in Dubsado to flodesk. We will filter the automation, which means you will need a paid account with Zapier in order to have a multistep Zap.
The first part of the multi-step Zap is to pull the information into Zapier by using the Dubsado trigger – new project as lead.
Use Filter by Zapier to Filter based on the newly created Client Mapped Field.
Add the Action: Create/Update New Subscriber in Flodesk
-
Add them to the newly created Segment
-
Pull in from Initial Trigger / Dubsado
-
Email
-
First Name
-
Last Name
-

Lucky for you, I’ve done the hard work of creating the different steps, and you can in two clicks add it to your Zapier account.
Steal the Zap Here
A workaround from a multi-step Zap would be to have two free zaps.
The first one sends the information to Airtable. You would create an Airtable view where only the Yes’s are showing (a filtered view).
Then the second Zap would pull the information from that Airtable view to flodesk.
And you’re done!
Use my affiliate links below to save you money if you want to use the platforms at no cost to you, but I do get a small amount from the companies for sharing them with you.
Does your creative small business need help getting organized? Schedule a clarity call with me and see how the Smarter Creative can help you get your business in order!
")